AmazonLinux + GlassFish4 OpenSource版インストールメモ
基本的にこちらの手順に沿ってインストールします。
JDK7ののインストール
Java SE Downloadsのページから。ここでは「jdk-7u25-linux-x64.rpm」を選択します。
$ wget http://download.oracle.com/otn-pub/java/jdk/7u25-b15/jdk-7u25-linux-x64.rpm?AuthParam=1371954590_3d03cab91de40b402e438ee42549fbf7
$ mv jdk-7u25-linux-x64.rpm\?AuthParam\=1371954590_3d03cab91de40b402e438ee42549fbf7 jdk-7u25-linux-x64.rpm
$ sudo rpm -ivh jdk-7u25-linux-x64.rpm
GlassFish4のインストール/起動
GlassFish Server - Download Pageこちらのリンクから「glassfish-4.0-ml.zip」を選択します。
$ wget http://download.java.net/glassfish/4.0/release/glassfish-4.0-ml.zip
$ unzip glassfish-4.0-ml.zip
$ ./glassfish4/bin/asadmin start-domain
Exception in thread "main" java.lang.UnsupportedClassVersionError: org/glassfish/admin/cli/AsadminMain : Unsupported major.minor version 51.0
        at java.lang.ClassLoader.defineClass1(Native Method)
        at java.lang.ClassLoader.defineClass(ClassLoader.java:634)
        at java.security.SecureClassLoader.defineClass(SecureClassLoader.java:142)
        at java.net.URLClassLoader.defineClass(URLClassLoader.java:277)
        at java.net.URLClassLoader.access$000(URLClassLoader.java:73)
        at java.net.URLClassLoader$1.run(URLClassLoader.java:212)
        at java.security.AccessController.doPrivileged(Native Method)
        at java.net.URLClassLoader.findClass(URLClassLoader.java:205)
        at java.lang.ClassLoader.loadClass(ClassLoader.java:321)
        at sun.misc.Launcher$AppClassLoader.loadClass(Launcher.java:294)
        at java.lang.ClassLoader.loadClass(ClassLoader.java:266)
Could not find the main class: org.glassfish.admin.cli.AsadminMain. Program will exit.
AmazonLinuxにOpenJDKが入っているのでエラーになったようです。1.7.0に変更します。(参考)
sudo update-alternatives --install /usr/bin/java java /usr/java/jdk1.7.0_25/bin/java 17025
sudo update-alternatives --install /usr/bin/javac javac /usr/java/jdk1.7.0_25/bin/javac 17025
もう一回トライ
$ ./glassfish4/bin/asadmin start-domain
Waiting for domain1 to start ...................................
Successfully started the domain : domain1
domain  Location: /home/ec2-user/glassfish4/glassfish/domains/domain1
Log File: /home/ec2-user/glassfish4/glassfish/domains/domain1/logs/server.log
Admin Port: 4848
Command start-domain executed successfully.
起動しました。
ブラウザから確認
4848ポートを有効にしてブラウザからアクセスします。

設定変更
デフォルトだとユーザIDが「admin」パスワードが空なので変更します。
$ ./glassfish4/bin/asadmin change-admin-password
Enter admin user name [default: admin]>admin
Enter the admin password>
Enter the new admin password>
Enter the new admin password again>
Command change-admin-password executed successfully.
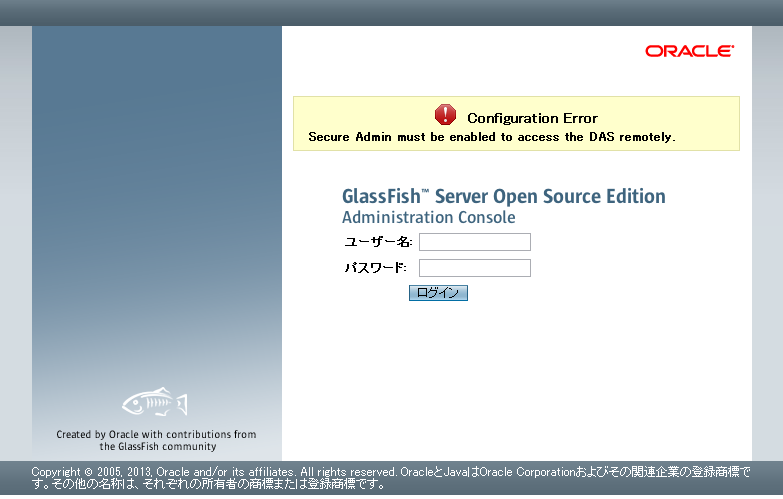
「Secure Admin must be enabled to access the DAS remotely.」が出ていたので設定を変更します。
$ ./glassfish4/bin/asadmin --host [EC2パブリックDNS] enable-secure-admin
Enter admin user name>  admin
Enter admin password for user "admin">
You must restart all running servers for the change in secure admin to take effect.
Command enable-secure-admin executed successfully.
再起動します。
$ ./glassfish4/bin/asadmin stop-domain
Waiting for the domain to stop .
Command stop-domain executed successfully.n executed successfully.
$ ./glassfish4/bin/asadmin start-domain
Waiting for domain1 to start ...............................
Successfully started the domain : domain1
domain  Location: /home/ec2-user/glassfish4/glassfish/domains/domain1
Log File: /home/ec2-user/glassfish4/glassfish/domains/domain1/logs/server.log
Admin Port: 4848
Command start-domain executed successfully.

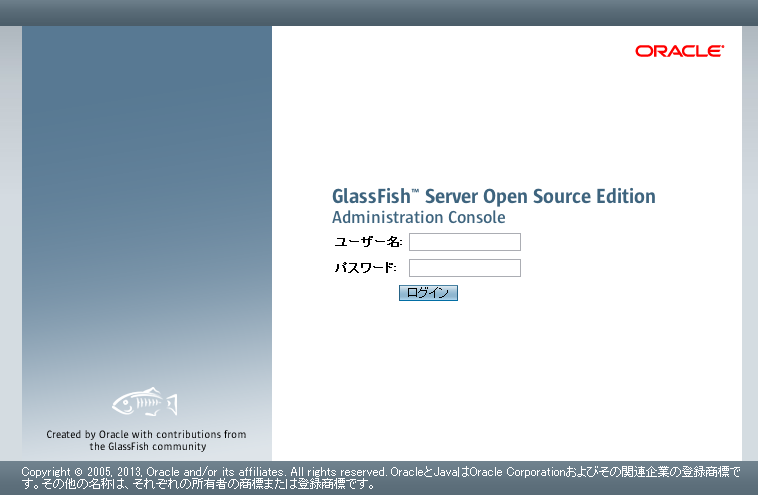
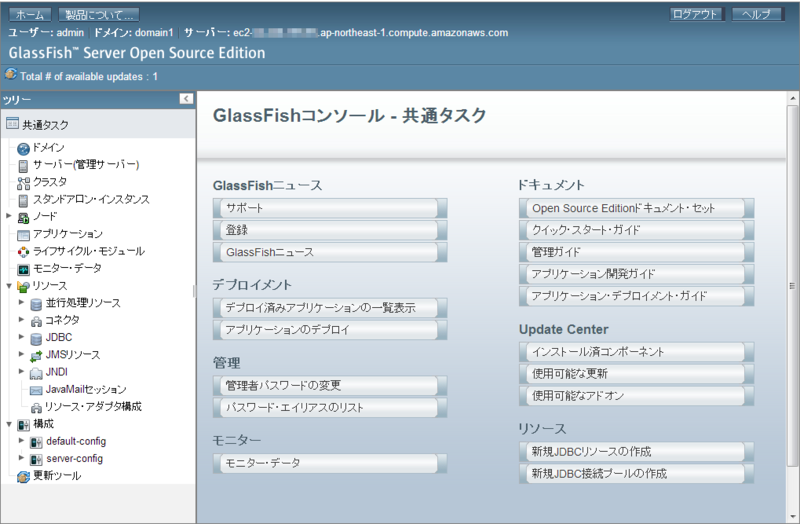
再起動したらエラーメッセージが消えているので変更したID/パスワードでログイン

実際に使うときはホスト名指定してSSL証明書を入れる必要があると思いますが、
とりあえず使えそうです。
JerseyClientで認証
Jerseyを使用したAPIのテストに使っていたJerseyClientは通常のHTTPクライアントとしても
便利なことに気づいたのでテストに使ってみる。
認証が必要な場合があったので自分用メモ
Basic認証を使う場合
// クライアント生成
ClientConfig config = new DefaultClientConfig();
Client client = Client.create(config);
// Basic認証の設定
Client. addFilter (new HTTPBasicAuthFilter ("USER_ID", "PASSWORD"));
// Formの設定
Form form = new Form();
form.add("title", "タイトル");
form.add("comment", "コメント");
// リクエスト送信
WebResource wr = client.resource("URL");
ClientResponse response = war. post (ClientResponse. class, form);
セッションを使う場合
// クライアント生成
ClientConfig config = new DefaultClientConfig();
Client client = Client. creates (config);
// Cookieを扱うフィルタを設定
client.addFilter(new ClientFilter() {
    private ArrayList<Object> cookies;
    @Override
    public ClientResponse handle(ClientRequest request) {
        if (cookies != null) {
            request.getHeaders().put("Cookie", cookies);
        }
        ClientResponse response = getNext().handle(request);
        if (response.getCookies() != null) {
            if (cookies == null) {
                cookies = new ArrayList<Object>();
            }
            cookies.addAll(response.getCookies());
        }
        return response;
    }
});
// ログイン
Form formLogin = new Form();
formLogin.add("userid", "USER_ID");
formLogin.add("password", "PASSWORD");
WebResource wrLogin = client.resource("LOGIN_URL");
ClientResponse resLogin = wrLogin.post(ClientResponse.class, formLogin);
// Formの設定
Form form = new Form();
form.add("title", "タイトル");
form.add("comment", "コメント");
// リクエスト送信
WebResource wr = client.resource("URL");
ClientResponse response = wr.post(ClientResponse.class, form);
参考) java - Jersey Client: Adding Cookies to Request - Stack Overflow
EC2インスタンス自身に設定されたタグを取得する
EC2インスタンスから「http://169.254.169.254/latest/meta-data/」にアクセスすることで
呼び出し元インスタンスのメタ情報が取得出来ますが(参考)
aws-java-sdkに見当たらなかったので自分で作ってみた。
package jp.yustam.aws.ec2.util;

import java.io.IOException;
import java.io.InputStream;
import java.net.HttpURLConnection;
import java.net.URL;
import java.util.ArrayList;
import java.util.Arrays;
import java.util.List;

import org.apache.commons.io.IOUtils;

import com.amazonaws.services.ec2.AmazonEC2Client;
import com.amazonaws.services.ec2.model.DescribeTagsRequest;
import com.amazonaws.services.ec2.model.DescribeTagsResult;
import com.amazonaws.services.ec2.model.Filter;
import com.amazonaws.services.ec2.model.TagDescription;

public class EC2Metadata {

    private static final String METADATA_URL = "http://169.254.169.254/latest/meta-data/";

    public List<TagDescription> getTags(AmazonEC2Client client) throws IOException {
        List<Filter> filters = new ArrayList<Filter>();
        String instanceId = readResource("instance-id");
        filters.add(new Filter("resource-id", Arrays.asList(instanceId)));
        DescribeTagsResult tags = client.describeTags(new DescribeTagsRequest(filters));
        return tags.getTags();
    }

    private String readResource(String resourcePath) throws IOException {
        URL url = new URL(METADATA_URL + resourcePath);

        HttpURLConnection connection = (HttpURLConnection) url.openConnection();
        connection.setConnectTimeout(1000 * 2);
        connection.setRequestMethod("GET");
        connection.setDoOutput(true);
        connection.connect();

        InputStream response = connection.getInputStream();
        String resource = IOUtils.toString(response);
        IOUtils.closeQuietly(response);
        return resource;
    }
}
実行してみる
List<TagDescription> tags = new EC2Metadata().getTags(ec2client);
for (TagDescription tag : tags) {
    System.out.println("[TAG]\t" + tag.getKey() + "\t" + tag.getValue());
}
結果
[TAG]   Name    WebServer001
[TAG]   Config  CustomTagTest
[TAG]   aws:autoscaling:groupName       as-group-001
これを使えばEC2タグの設定によって動作を変えることができる。
リージョン指定をsetEndpointからsetRegion/RegionUtilsに変える
aws-java-sdkを1.4.1にしたら追加されていたのでメモ
東京リージョンを使ってるとエンドポイントの指定が地味に面倒だったので嬉しい
今まで
public AmazonEC2Client ec2client(AWSCredentials cre) {
    AmazonEC2Client client = new AmazonEC2Client(cre);
    client.setEndpoint("ec2.ap-northeast-1.amazonaws.com");
    return client;
}
これから
public AmazonEC2Client ec2client(AWSCredentials cre) {
    AmazonEC2Client client = new AmazonEC2Client(cre);
    client.setRegion(RegionUtils.getRegion(Regions.AP_NORTHEAST_1.getName()));
    return client;
}
node.js+fluentdを使ってMongoLabのMongoDBでログを収集
Fluentdのインストールはこちらを参考に
nodeへの設定方法はこちらを参考にしました。
td-agent.conf
/etc/td-agent/td-agent.confは以下になりました。
<source>
  type forward
  port 24224
</source>
<match fluentd.mongo.**>
  type mongo

  database dbname
  collection logs

  host ds000000.mongolab.com
  port 99999

  user username
  password password

  flush_interval 10s
</match>
サンプルコード
var logger = require('fluent-logger');
logger.configure('fluentd.mongo', {host: 'localhost', port: 24224});

logger.emit('test', {message: 'hoge'});
出力結果
mongolabのブラウザから確認するとログが取得できてました。
{
    "_id": {
        "$oid": "51501392d3df673162000001"
    },
    "message": "hoge",
    "time": {
        "$date": "2013-03-25T09:06:20.163Z"
    }
}
別のInputプラグインを使用すれば他の言語でも簡単に組み込めそうです。
node.jsからMongoLabのMongoDBに接続する
mongolabはMongoDBのホスティングサービスで、500MBまで無料みたいなので
WindowsAzureのCentOSにnode.js実行環境を構築して使ってみました。
自前でMongoDBを用意した場合も手順は同じだと思います。
データベース作成
mongolabにSign Upしてデータベースを作成します。
簡単なので割愛。作成するとホスト名とポート番号が振られるのでメモします。
MongoDBのモジュールをインストール
以下のコマンドを実行
$ npm install mongodb
MongoDBに接続する
Server生成 -> DB生成 -> 認証 -> コレクション操作
の手順で作成したデータベースに接続します。
var mongo = require('mongodb');
var server = new mongo.Server('ds000000.mongolab.com', '99999');
var db = new mongo.Db('dbname', server, {safe: false});

// 引数の取得
var message = process.argv[2];
var test_mongolab = function(err, collection) {
    // 引数がある場合はINSERT
    if (message) {
        collection.insert({text: message, date: new Date()});
    }
    // コレクションを確認
    collection.find().toArray(function(err, results) {
        console.log(results);
        db.close();
    });
}
// DB接続
db.open(function(error, data) {
    // 認証
    data.authenticate('username', 'password', function(err, data){
        // コレクション操作
        db.collection('messages', test_mongolab);
    });
});
実行結果
$ node mongolab.js mongolab
[ { text: 'mongolab',
    date: Sat Mar 23 2013 11:38:29 GMT+0000 (UTC),
    _id: 514d943516849d410f000001 } ]
Java Logging APIでログレベル毎に出力先を分けたい
Java Logging APIのConsoleHandlerはデフォルトでSystem.errに出力する。
今回はLevel.INFOから下はSystem.outでそれより上はSystem.errに出力のように
出力先を分けたいと思ったので作ったものをメモ
作ったクラス
package jp.yustam.logging;

import java.io.OutputStream;
import java.util.logging.Filter;
import java.util.logging.Level;
import java.util.logging.LogRecord;
import java.util.logging.SimpleFormatter;
import java.util.logging.StreamHandler;

public class CustomHandler extends StreamHandler {

    public CustomHandler(OutputStream out, Level min, Level max) {
        super();
        setOutputStream(out);
        setFilter(new CustomFilter(min, max));
        setFormatter(new SimpleFormatter());
        setLevel(Level.ALL);
    }

    @Override
    public synchronized void publish(LogRecord record) {
        super.publish(record);
        flush();
    }

    @Override
    public void close() {
        flush();
    }
}

class CustomFilter implements Filter {

    /** 出力する最小のレベル */
    private final Level min;
    /** 出力する最大のレベル */
    private final Level max;

    CustomFilter(Level min, Level max) {
        this.min = min;
        this.max = max;
    }

    public boolean isLoggable(LogRecord record) {
        return (min.intValue() <= record.getLevel().intValue())
                && record.getLevel().intValue() <= max.intValue();
    }

}
使い方
private static Logger logger = null;
protected static Logger getLogger(){
    if (logger == null) {
        logger = Logger.getLogger(Logger.GLOBAL_LOGGER_NAME);
        // ↓を設定しないとデフォルトのログも一緒に出る
        logger.setUseParentHandlers(false);
        // FINEST < FINER < FINE < CONFIG < INFO < WARNING < SEVERE
        logger.addHandler(new CustomHandler(System.out, Level.FINEST, Level.INFO));
        logger.addHandler(new CustomHandler(System.err, Level.WARNING, Level.SEVERE));
    }
    return logger;
}